It is very easy to use the grid in a dialog-based application. See below for more details.
1. Create a dialog-based application.
2. Configure the application as shown in How to install the MFC grid and compile the first application?
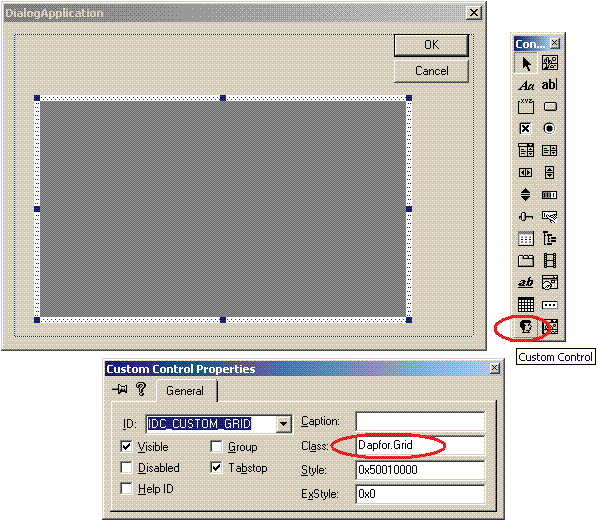
3. Open the Control Panel, select a Custom Control and put this control to the dialog form. Then type Dapfor.Grid in the 'Custom Control Properties' window in the 'Class' edit box as shown below:
4. Add a member of CGrid to the dialog
#pragma once
#include <Dapfor/GUI/Grid.h>
class CDialogApplicationDlg : public CDialog
{
...
protected:
virtual void DoDataExchange(CDataExchange* pDX);
private:
Dapfor::GUI::CGrid m_Grid;
};
5. Implement DoDataExchange mechanism for the grid control
void CDialogApplicationDlg::DoDataExchange(CDataExchange* pDX)
{
CDialog::DoDataExchange(pDX);
DDX_Control(pDX, IDC_CUSTOM_GRID, m_Grid);
}
6. The dialog is ready. Now you can add some columns to the header and configure the grid in the OnInitDialog() handler.
 1.5.5
1.5.5